How to Prepare for a Successful Room Makeover
What steps do you take when organizing or making over a space?
Each time someone asks me that question I am both stumped and tickled.
It takes me back to my grade school years, when I would ask my father a math question. A veritable genius at computations, he would sometimes answer in a way that made sense only to him. While I admired his “bond” with the world of numbers, his long-winded mathematical explanations flooded my mind with such intensity it felt as if my eyeballs were floating.
I certainly don’t consider myself a genius of any kind. However, when it comes to designing, decorating and organization, the process flows so effortlessly in my mind, that I don’t even realize there are “steps” involved. Thus when presented with the question mentioned at the outset, I am ever aware of how easy it is to overwhelm the listener (or reader in this case) with my answer.
Affiliate links may be included in this post. This means that should you purchase a linked product, I may receive a small commission, but at no additional cost to you. To read my full disclosure click here.
Additionally, since I’ve begun taking on clients, I’ve noticed that I’m often confronted with the same “doe-in-the-headlights-stare”, after I’ve explained my concept to them. It quickly occurred to me that I should at least outline my basic approach. That is, if I want to avoid passing on the floating eyeball syndrome.
I’ll do my best to explain it here. But if you start to feel like you’re being transported to outer space at any time during this post, feel free to bookmark it and pick it up again a bit later.
Steps to Follow When Considering a Room Makeover

1. WHAT IS THE FUNCTION OF THE SPACE?
It can be easy to assume you know the answer to that question. Most rooms however contain numerous sub-function areas. For example an office may also serve as a guest bedroom, a place to do morning exercises, and a small TV room. From the beginning, I try to determine all the things the space needs to do.
2. REMOVE SMALL ITEMS, ASSESS WHAT'S LEFT, MEASURE
Most times I am working with a space that is fully or partially furnished. So my approach is to remove all the small decorative items from the space, including lamps and side tables, and leave the large furniture pieces (sofas, pianos, large buffets).
With the space now cleared, I record the measurements of the area and of every piece of furniture that will be used there.

3. WHAT EXPERIENCE(S) SHOULD THE SPACE DELIVER?
Perhaps it’s due to my obsession with small spaces, but I like rooms to do a lot more than just look pretty and function well. A space should “tap into the minds” of those who enter it; it should brand itself like an iron into a person’s soul so that it’s hard to forget it.
The best examples of this is the “Shhh” sign and the "cloud" light fixture in my last makeover, or the mirror and wallpaper used in my hallway revamp. Apparently these elements struck a nerve with a lot of my readers because I receive the most inquiries on them. Whatever it is that people “feel” when seeing those elements, THAT’s the experience I try to introduce to every space. It requires a good amount of daydreaming on my part to nail it. If you decide that you want to incorporate a wow factor into your space, be patient and let it come to you.
4. SET A BUDGET AND ADD 20 PERCENT
Need I say more? A makeover can turn into a black hole very quickly. Even if I'm only adding a $15 diy project, I set my budget and add a 20 percent. (A standard contingency budget may range from 15-25%.) Sometimes items will cost more than anticipated. The extra cushion helps ease the shock a bit. My motto is, “If I can’t afford to have a contingency budget, I can’t afford the makeover. Period.”
“If I can’t afford to have a contingency budget, I can’t afford the makeover. Period.”
Using a simple spreadsheet, I list every item I plan to purchase for the space, along with the maximum amount I'm willing to pay for it. I then create a third column to enter the actual cost. This helps me to stay committed to the budget I've set.

5. GO ANALOG
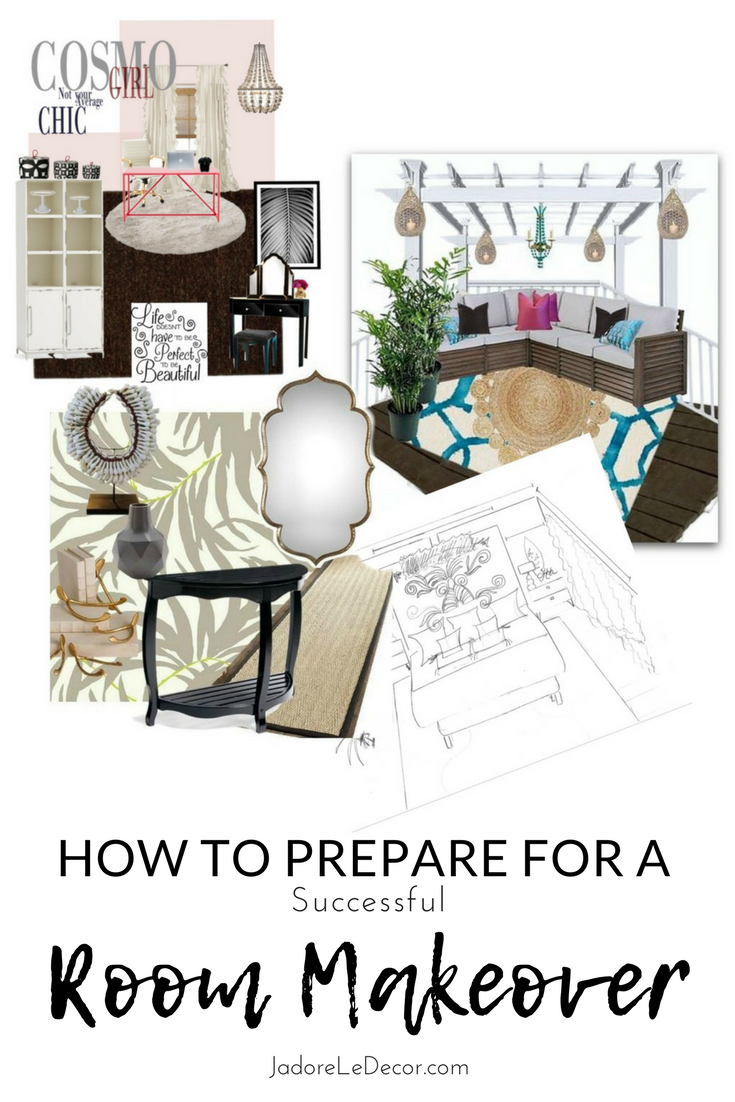
This is the most exciting part for me. Pinterest is great source for ideas. And I often use fancy programs like Photoshop to make my mood boards pretty for you dear folks. The truth is though that most times I just sketch my ideas out by hand. I will even cut desired items out of magazines or printed pages from the internet and glue them directly onto my sketch. This analog method of developing a mood board is more realistic and tangible for me. It helps me to get a better feel for the space I’m working with.
Inspiration can jump out from anywhere. So I finish this process by taking a photo of my idea with my cell phone for easy reference if I need it.
Of course there are a number of other steps I could include about furniture placement, paint colors, accent colors, furniture and material selection. But that would turn this post into something resembling the Bible. Hopefully I've supplied you with enough meat to get you started on the right track with your next project.
Whatever you do, just remember that a room makeover is a bit of a journey, so take your time and enjoy the process. Happy decorating!
Please tell me in the comments below, did you find this post helpful?