The Best, Most Affordable DIY Acrylic Picture Frames Ever
Floating acrylic picture frames bring an artsy museum-like elegance to even the most ordinary spaces. Sometimes referred to as plexiglass frames or frameless picture frames, these frames are my top choice for displaying unique art prints and even posters. And they’re a great alternative to traditional photo gallery walls.
Their barely-there look is airy and crisp and very high touch. The best part is that acrylic photo frames will work with any type of decor from traditional to vintage, to my personal favorite - global bohemian chic.
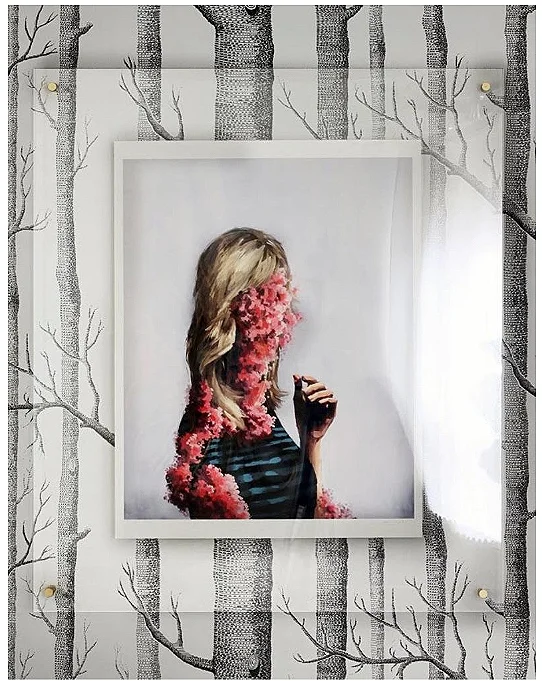
But have you ever checked the price of acrylic photo frames??? That beautiful floating frame in the image below will set you back a solid $120 bucks. For. One. Frame. Yikes! Yep, after seeing similar prices elsewhere, I knew exactly what I needed to do. I needed to dig deep to create a low-cost, high-end looking, DIY floating acrylic frame. The acrylic frame tutorial you are about to read is helpful for anyone looking for easy, affordable ways to upgrade the look of their art collection at home.
Affiliate links may be included in this post. This means that should you purchase a linked product, I may receive a small commission, but at no additional cost to you. To read my full disclosure click here.
What You’ll Need
- Standoffs to mount your frames
- Acrylic sheets - One set of 2 for each frame (keep reading for ideas on where to find them)
- A large metal tent stake or nail (TIP: I found one at Ace Hardware for $1.50)
- 4 spring clamps to hold the acrylic in place while you work on it
- A drill for mounting the wall hardware
Where to Buy Acrylic Sheets to Make the Floating Frames
Are the frames you need significantly smaller? If so, the deal gets even sweeter. Just ask the Ace Hardware glass cutter if he has any left over acrylic from previous cuts that match your size. Ace Hardware will sell them to you for a fraction of the original cost. I did that when recreating this tutorial and only spent a mere $1.50 for four 9 x 11 sheets. Ace is definitely the place ya’ll!
I know however that some really cheap...ahem...frugal people will say "But Ola, I found acrylic sheets even cheaper at Hobby Lobby!". Let the buyer beware though. Those are super thin, craft grade acrylic sheets and will never hold up over time.
Now for the standoffs. After ordering a set that was too small to make an impact, I settled on these reasonably priced silver 1/2” x 4/5” wall mount standoff bolts. They come 20 to a pack.

How to “Drill” the Holes for the Acrylic Picture Frame
Drilling the holes to make your acrylic picture frames might sound like a no-brainer to you, but it can get pretty tricky. In fact, not knowing more about this crucial step forced me to have to buy more acrylic because I ruined the first set. Suddenly the budget for my oh-so-affordable DIY acrylic frames increased by 50 percent. Ouch! Avoid mistakes by paying close attention to these instructions.
You see, when drilling the holes for your standoffs you must drill very, very slowly, or the acrylic will crack. I’m going to show you how to avoid that situation altogether. Instead of drilling the hole (like I did at first), do the following:
DO NOT remove the protective plastic from the frame
Mark the locations of your 4 holes on the first piece of acrylic. Use your first piece as a template for the rest of the pieces to make sure the holes are all line up.
Heat the large metal stake or nail over a fire
Pierce the location for the hole
Allow the melted edges of the plastic to cool. These should then snap right creating a clean hole for your standoff.
This is MUCH, much easier than drilling the hole. Use a pair of vice grips to hold the metal stake in place, and to avoid burning yourself.


How to Install Your Snazzy New Floating Wall Frames
Here is the easiest way to install your new frames:
Place one piece of ready-to-hang acrylic sheet directly onto the wall where it will be hung
With your other hand, use a level to make sure the acrylic frame is straight
Use a pen/pencil to mark the location of the holes directly onto the wall
Drill hole and insert anchor
Sandwich your print or photo between 2 pieces of acrylic and thread the standoff through the holes to mount
Your standoffs will usually come with anchors. I strongly recommend using them. You don’t want to wake up in the middle of the night to discover these fine thangs cracked and shattered on the floor do you? I didn’t think you did. So please use the anchors.

“Worried about putting too many holes in the wall? Just fasten the two top standoffs to the wall. Then attach the standoffs to the bottom holes of the frame, but DO NOT fasten them to the wall. No one will be the wiser. I saw this done at a hotel once and it blew me away. ”
Congratulations! You’ve now created THE best, most affordable DIY acrylic frames ever. Now all you have to do is sit back and enjoy your newly created chef d’oeuvre (masterpiece).


Would you like to see how I hacked the artwork pictured below? Click the image to read the full post.


Something For Your Pinterest Board