
One Room Challenge: What to Know About Stringing a Chandelier
ORC Week 5 of 7
I've got exciting news to announce! Due to the number of participants affected in various ways by the recent onslaught of natural disasters, the host of the One Room Challenge has granted us a one-week extension. This means that more than 200 other bloggers and I now have 7 weeks to complete our rooms. How thoughtful, right?
This additional week gives me just enough time to pull off this last DIY that I just can't seem to stop DIY'ing. Has that ever happened to you? Better yet, have you ever completed a difficult project that made you proud— so proud that you questioned whether you would undertake it again? If so, you will fully understand this post.
Affiliate links may be included in this post. This means that should you purchase a linked product, I may receive a small commission, but at no additional cost to you. To read my full disclosure click here.

As many of you know, I had a plan to complete a non-electrical hanging light fixture to finish off my space. Since my 14 foot-long, 36 inch-wide hallway has no accessible outlet or j-box, this seemed like the best option. Well let me tell you...this is probably the most meticulous, time-consuming "craft" project I've ever done!
The first thing you should know is that stringing a chandelier is not as easy as some of those tutorials make it appear. I dare not mislead you. But just in case you have an overwhelming desire to try this at home, I've included as many steps as possible in this tutorial. Let the reader be warned though - there were many detours and breaks during this project. So if I missed a step or two, I'm terribly sorry.
Nevertheless, I'll do my best to illustrate what you need to know in order to string your own chandelier.
How to String a Chandelier - Prepare Yourself Mentally for the Challenge
Level of Difficulty: 5 out of 5 (For better planning please read through the entire list of instructions before attempting to create your own.)
What You Will Need:
- 1 Hanging planter
- 1 Small embroidery hoop (use inner ring/hoop only)
- 1 Small slightly transparent plate (glass or plastic)
- 2 Sets of remote controlled fairy lights (I purchased mine here)
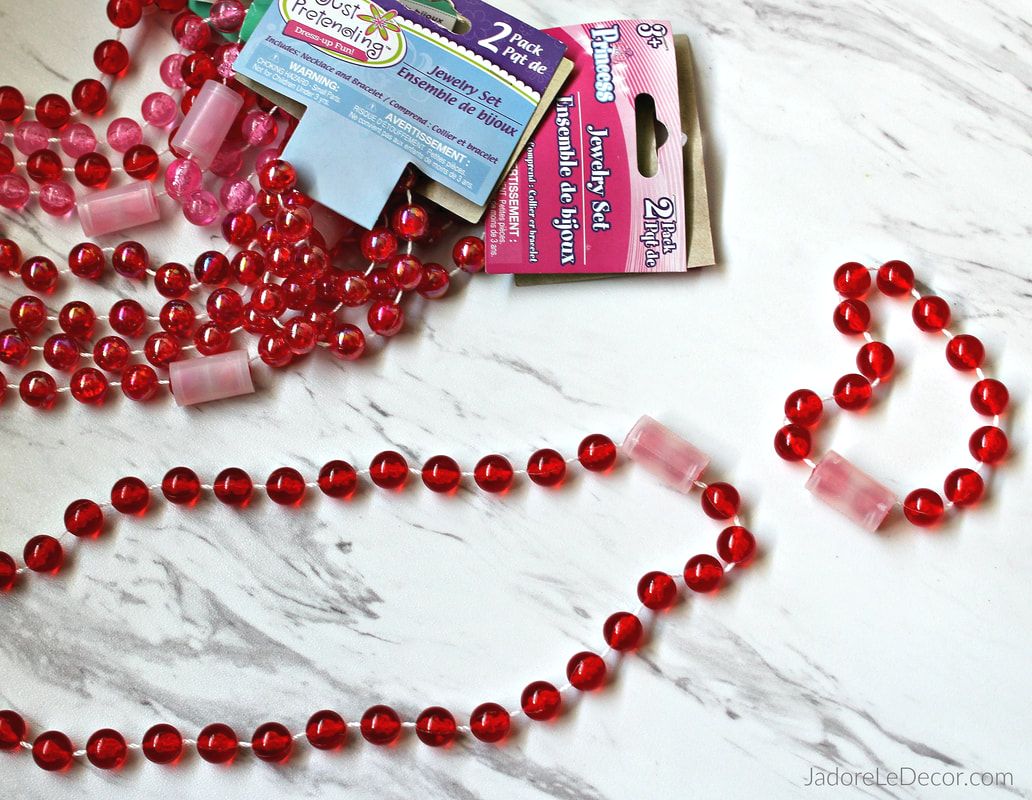
- 32 Strings of beaded necklaces (I purchased mine here from DollarTree) NOTE: This amount will vary depending on the size of your hanging planter
- 1 Ring of clear elastic stretch jewelry beading thread
- 1 Metal or plastic hanger strap
- Cording, raffia or string for wrapping
- Canned spray paint, your choice of color (optional)
- A place to hang your fixture while you work on it


1. Spray Paint Your Planter
If you don't like the color of your beads, or if you're using multi colored beads, you will need to do this again when you've finished the fixture.
2. Prep and Test
Cut each beaded necklace to create long strands. My necklaces were clipped together. I saved the clips for use later on in this tutorial.
Determine how you want your beads to be strung on the planter. Following some Pinterest tutorials, I first attempted to attach the beads using a soft wire. But this proved to be a nightmare to my fingers. It also looked awful. What's the point of a DIY if it's going to look like one? Thru trial and error, I found that the easiest tool to work with was by far the elastic jewelry thread. It also does a great job of keeping the beads in place.


3. Start Stringing Your Chandlier Little by Little
Once you've determined your design, use your stretchy jewelry string to attache ONE string of beads to the planter. Then ask :
- Do I like how it looks?
- Does it drape the way I like?
- Do I have enough beads to continue around the "bowl" and to the top of the planter?
- Do not continue until you are satisfied
I stopped the beads right at the lip of my planter "bowl". In retrospect, I should have continued the strands as far as I could. This would have made things easier for myself later on, as you will see.
4. Count
When you're comfortable with step 3, count out each head of the beaded string you JUST attached. Whether it's 15, 20 or 25 you must use the same number of beads all the way around, or your fixture will be lopsided.
5. Continue Adding Beads
Add the stringed beads all the way around the planter bowl. It nevere looks pretty in the beginning. But TRUST ME, it will turn out great.

6. Add the Tapestry Ring at the Appropriate Height for Your Fixture
I added small tapestry ring near the top and began stringing my second set of beads, starting from the rim of the planter bowl, to the top of the tapestry ring. Notice that I used the connectors to line up the top set of beads with the bottom.
NOTE: In retrospect, it would have been easier had I just continued the full string of beads from the base of the planter and strung them as far as they would go. THEN I could have used only one connector at the top. This would have made this project a LOT easier. Ugh... As they say, hind sight is 20/20. Using two sets of connectors necessitated the next step.


7. Optional: Spray Paint Your Fixture with a Final Color
I have not completed this option yet. While this color would fit the space, it's a bit wild. It could grow old on me very quickly. I'm also not sure I want to put my exceptionally patient husband to the test. Heh, heh. But who knows? He may like it. Stranger things have happened. I guess you'll just have to wait until the final reveal to see what color we decide. Ha!
8. Hide the Bead Connectors
To hide the bead connectors (or for simple embellishment), take a strip of metal hanger strap and wrap it with your choice of rope, ribbon, or raffia. Secure to make a circle and attach to the fixture using the stretchy jewelry string.
9. Insert a Clear Plate or Large Disk (optional)
To hide the open circle. Why? This will serve as a base for the fairy light battery pack. Of course if you have a nearby outlet, you can skip the fairy lights and use a lighting kit.


10: INSERT FAIRY LIGHTS, hang and enjoy!
Because this was my very first attempt at stringing a chandelier, the process took roughly 4-6 hours. But I worked on it over a period of about 2 weeks.
I still have a few areas to tighten up on this project (i.e. peeping connectors and wobbly beads at the top— both easily fixable). But overall I'm pleasantly surprised. I can't wait to see it in place with the lights on! Be sure to check back on the 15th of November for the big reveal!
Please tell me,
- How do you like this DIY?
- Do you think this is something you might ever attempt?
ORC Fall 2017 (weekly recap)
Week 1 / Week 2 / Week 3
Week 4 / Week 5 / Week 6 / The Reveal: Week 7

One more favor may I ask of you?
If you enjoyed this post
Please share, tweet or pin it.
Merci Beaucoup!
